Image may be NSFW.
Clik here to view.
Last post, we finished at applying Future (Johnson’s Wipe and Shine) to the kit. Now the kit is ready for the decals. That’s stage 7 of 15.
Still more work to do.
Check out the progress pics/report after the break.
Decal and Detailing
Now that I’ve applied a future coat, the decals will have a nice, gloss base. This makes for better adhesion.
But before that (and while waiting for stuff to dry). I detailed the jerry cans and other accessories first by painting them Olive Drab and then applying a light green drybrush on the edges just to bring out some detail.
Image may be NSFW.
Clik here to view.
Once ready, the cans and ammo boxes were glued to the kit
Image may be NSFW.
Clik here to view.
Next, the water-slide decals were affixed;
Image may be NSFW.
Clik here to view.
Image may be NSFW.
Clik here to view.
Washes
Next up would be a couple of washes to bring out the detail and to add some grime, dirt and muck (weathering) to the tank. No, a wash isn’t “washing” your kit with soap and water.
Basically, a wash is a mixture of paint + thinner (around 10:90) ratio… or the consistency of dirty thinner. Since I used Acrylic paints, it’s important to do your wash with another paint type. For this project, I used an Enamel wash. Pros prefer to use oils.
What you do is just use a medium sized brush and just lazily dab and brush it on. Capillary action will let the paint go into the panels and other details. Wait for it to dry for a few minutes and you can use cotton buds damped with some thinner to take away the excess.
Here’s the effect after the procedure.
Image may be NSFW.
Clik here to view.
Image may be NSFW.
Clik here to view.
Notice how the details now stand out? Quite different from just the base coat a few photos ago, eh?
For that wash, I used flat black.
I apply a second wash of Buff and White once that dried for more weathring and to simulate sand discoloration.
Paint Chipping and Battle Damage
Once the washes were all done, it’s time to apply some paint chips.
Before randomly painting away, it’s important to know how factories painted the tanks in real life. After the base metal, primer is applied. The color is usually grey or a shade of red or maroon. Next would be several coats of the base paint. Logically, when the paint chips, it shows an “onion” type of effect. Here’s a real-life photo on an Abram
Image may be NSFW.
Clik here to view.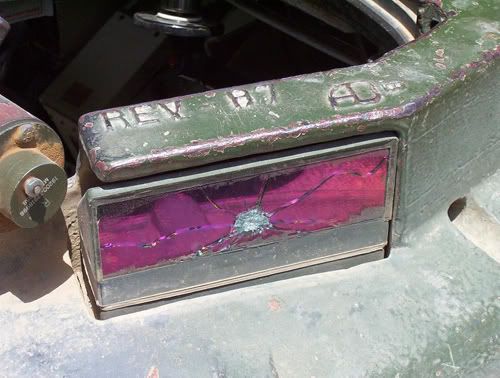
There are several methods to do paint chips. My preferred method below:
- Use a small brush and paint out light gray (Sky Grey) outlines on the edges or where you want the paint chips to be (not too much. Don’t overdo it)
- Let it dry for 30 minutes
- Overlay the gray with Olive Drab
- Optional to put some Rust (Nato Brown + Orange) on the chips
- For the bare metal to show, just use an HB pencil and rub it in
Here’s the actual effect once done…
Image may be NSFW.
Clik here to view.
Image may be NSFW.
Clik here to view.
Rust Effects
For my rust mixture, I used Tamiya Nato Brown mixed with Orange and Red. I then applied it via airbrush (with masking) to the tracks and then via hand-brush to some parts. I think the gas tank will have rust so there’s more there…
Image may be NSFW.
Clik here to view.
Image may be NSFW.
Clik here to view.
Whew! That was a long post.
Only 4 more stages to go: Sand/Mud, Dusting and the final flat coat. We’re almost there.
Stick around and visit everyday to check out on the progress of my tank…
Hope you enjoyed! Meanwhile, you can check out some of my other finished model kits below